

My big requirement when we built our home was to have a tub I could fit in. The day the tub was delivered was right up in favorite life moments (you know, right after the girls’ being born etc, etc). Just look at that big, cheesy smile: I love bath bombs, and have made a relaxing bath part of my Sunday Night Ritual, to get ready for the craziness of the week! Bath bombs can come with big price tags, so I searched Pinterest for the perfect recipe. After trying a few, and making my own adjustments, I *think* I have perfected the recipe!
  What you need:
- 1 cup baking soda
- 1/2 cup citric acid
- 1/2 epsom salt
- 1/2 cornstarch
- 2 1/2 tbsp almond oil
- 3/4 tbsp water
- 2 tsp essential oils (see below for some of my favorite blends!)
- bath bomb mold
- mixing bowl for wet ingredients and separate for dry ingredients
- soap coloring
What you do:
- Mix your dry ingredients together and whisk. Set aside.
- Mix your wet ingredients together in a separate bowl. This is where you can get creative with your scents and colors! I like to use soap coloring as opposed to food coloring, since food coloring can stain your tub. You can use any essential oil blends you like, but some of my favorites are:
- lavender + orange + ylang ylang
- orange + vanilla
- eucalyptus + peppermint + lavender
- This step is the most crucial. Add your wet ingredients to the dry ingredients SLOWLY. Like. Pour a tiny bit in and stir like the dickens. And then add more. SLOWLY. Adding too fast will cause the ingredients to react, and fizz. If they fizz, your bath bombs will expand and lump when drying. (Note: they still work in the tub, but they don’t work as well, and they don’t look nearly as pretty!)
- Once you’ve SLOWLY added your wet ingredients, continue to mix the mixture until it has the consistency of wet sand. I like to wear rubber gloves and use my hands. Once I can squeeze the mixture and it stays in the shape of my palm – I know it’s ready.
- Scoop your mixture into your bath bomb mold. You want it to be overflowing on both sides. Press them together and hold for 10 seconds. Gently tap the mold on both sides with a spoon to help release the bomb. And boom! There you go!
- Leave the bombs on parchment paper to dry for at least 24 hours before use!


I also wanted to share this #nailedit shot from my first batch. This is what happens when you don’t add your wet ingredients SLOWLY, and then it fizzes, and you just keep trying 😉 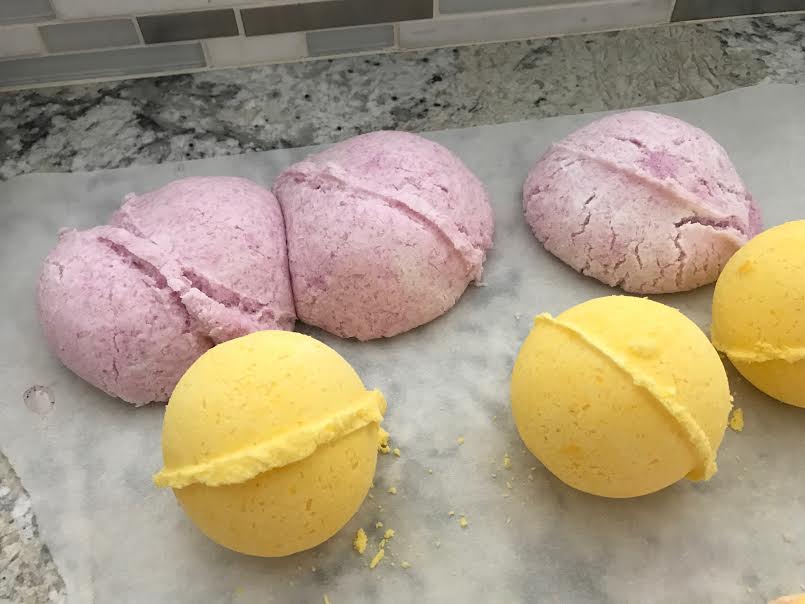


Oh! These look like Lush ones! Great job!
Thank you!!
Must make!!!!
Send pics if you do!!!
How cute!! I need to try this! I bet they smell amazing!
OH, they do!!
Thanks For Your Blog.
I love stress away and orange! might be a fun blend to try!!
I did not know you could make these at home!! Seems easy enoigh! thanks for sharing!
How ufn! I am going to make these this weekend! I will let you know how they turn out!
So fun!
I made these today! I added a little more water and they turned out sooo good! Can’t wait to try them in my next bath.
Oh fun!! So glad yours turned out the first time! (Mine were not pretty – but still worked!) enjoy your bath!!
Jenna, I had to come and tell you I made these for the second time over the weekend and they’re SO good. thank you for sharing this recipe!